QR Code Generator: How to Create a Code That Scans Reliably
A practical guide to creating QR codes, covering error correction, contrast, sizing for screens and print, design, and testing across devices.
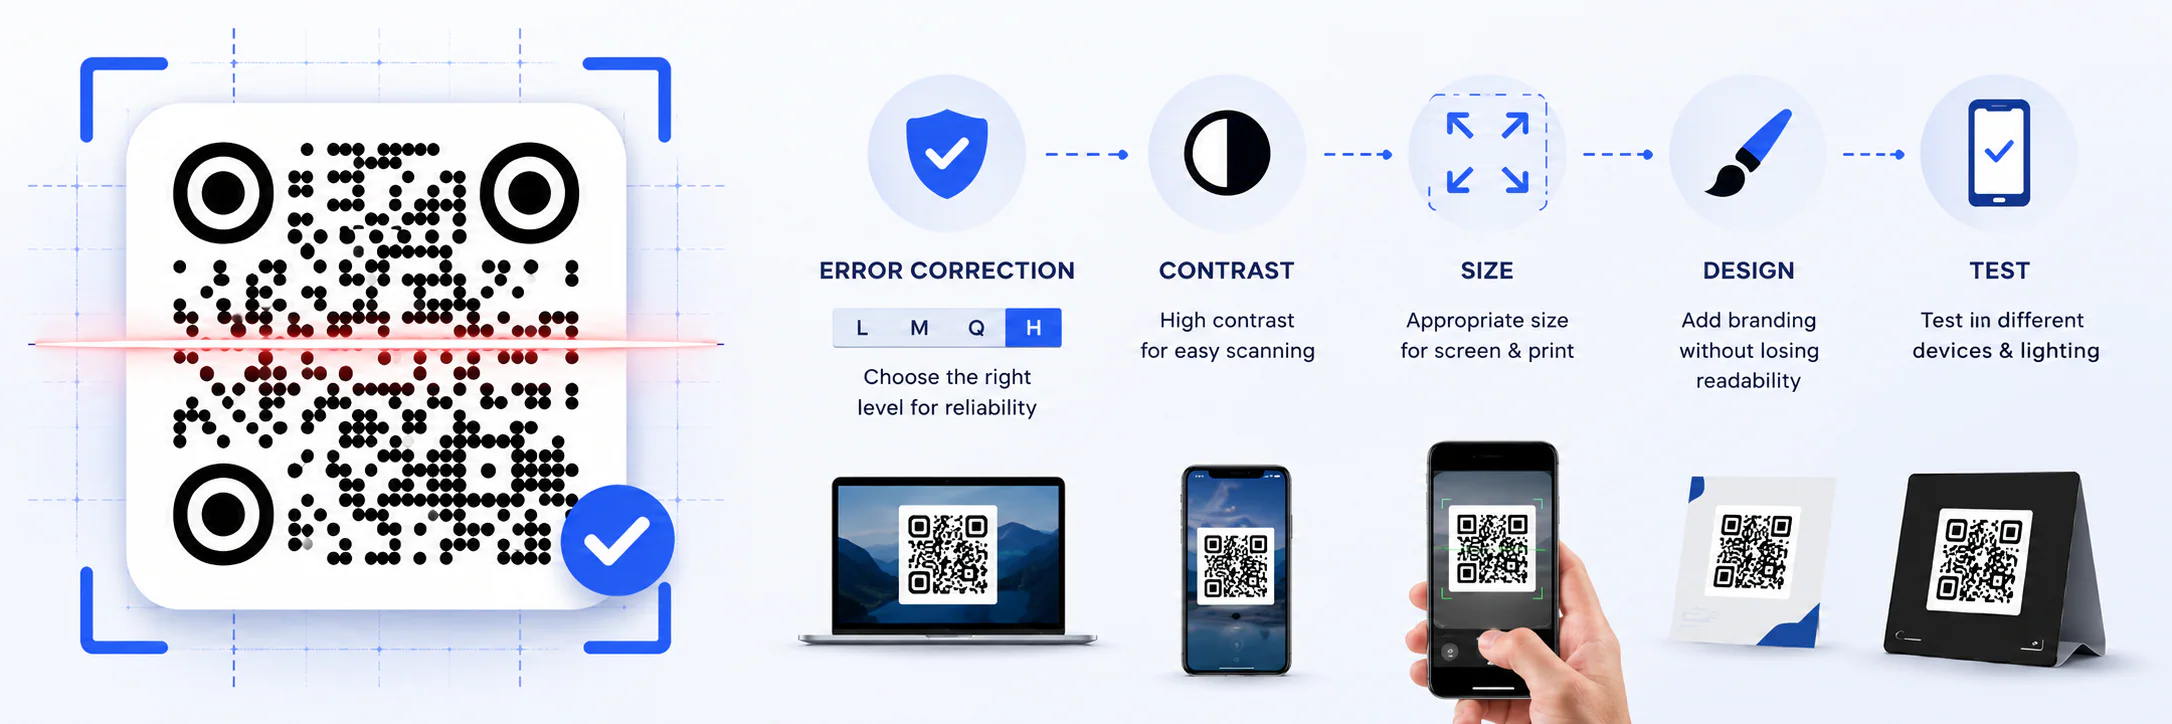
A QR code can work perfectly on a monitor and stop scanning once it is printed on a small glossy label. The link is rarely the problem. More often, the grid is too dense, the contrast or size is insufficient, or the design obscures the parts a scanner needs to recognize.
The MeoVC Free QR Code Generator lets you check these settings before downloading. This matters most for print: an image on a screen is easy to replace, but packaging, menus, or a batch of flyers must be produced again.
Try free MeoVC QR Code Generator
What a QR code stores
A QR code consists of dark and light modules, the small elements that form its grid. A scanner locates the three large corner markers, determines the orientation, and then reads the data.
The grid can store a website address, text, contact details, Wi-Fi settings, an email address, or other data. For a web page, the generator encodes the URL itself and the phone offers to open it in a browser.
The longer the content, the denser the grid becomes. Small modules are harder to distinguish in a small image, in poor lighting, or after imperfect printing. Remove unnecessary parameters from a link unless the page or your analytics depends on them.
There is one more choice: static or dynamic. A static code stores the final address directly in the grid and does not depend on a service, but changing the link requires a new image. A dynamic code points to an intermediate address. You can change its destination as long as the redirect service remains available.
Choosing an error correction level
QR codes support four error correction levels: L, M, Q, and H. They add redundant data that helps a scanner recover the content when some modules are dirty, worn, covered by a logo, or poorly printed.
According to DENSO WAVE, levels L, M, Q, and H can restore about 7%, 15%, 25%, and 30% of codewords, respectively. These are shares of codewords, not equal shares of the image area: one solid mark can still cover important parts of the grid. Damage to the corner markers or the clear space around the code is especially risky.
- L works for a clean on-screen image or large-format printing in good conditions.
- M is a sensible baseline for most uses.
- Q is useful for packaging, stickers, and materials that may get scratched or dirty.
- H provides the largest margin and is often needed when adding a logo.
A higher correction level makes the grid denser for the same amount of data. Do not choose H automatically: on a small code, the denser grid may cause more trouble than the extra margin prevents. M is a practical baseline for ordinary conditions; Q or H makes sense when dirt, damage, or a logo is expected.
Why contrast matters more than an attractive palette
The safest combination is a dark code on a plain, light background. It does not have to be black and white, but the modules must differ clearly from the background in brightness. Two saturated colors may look contrasting while having similar brightness, which makes the grid harder for a scanner to separate.
A light code on a dark background is known as an inverted code. Many apps recognize it, but support varies by scanner. If you do not know which devices the audience will use, keeping the modules darker than the background is safer.
Gradients, photos, and transparency increase the risk: the lightest part of the modules must still differ from the darkest part of the background. Before export, MeoVC checks color contrast and warns about a poor combination.
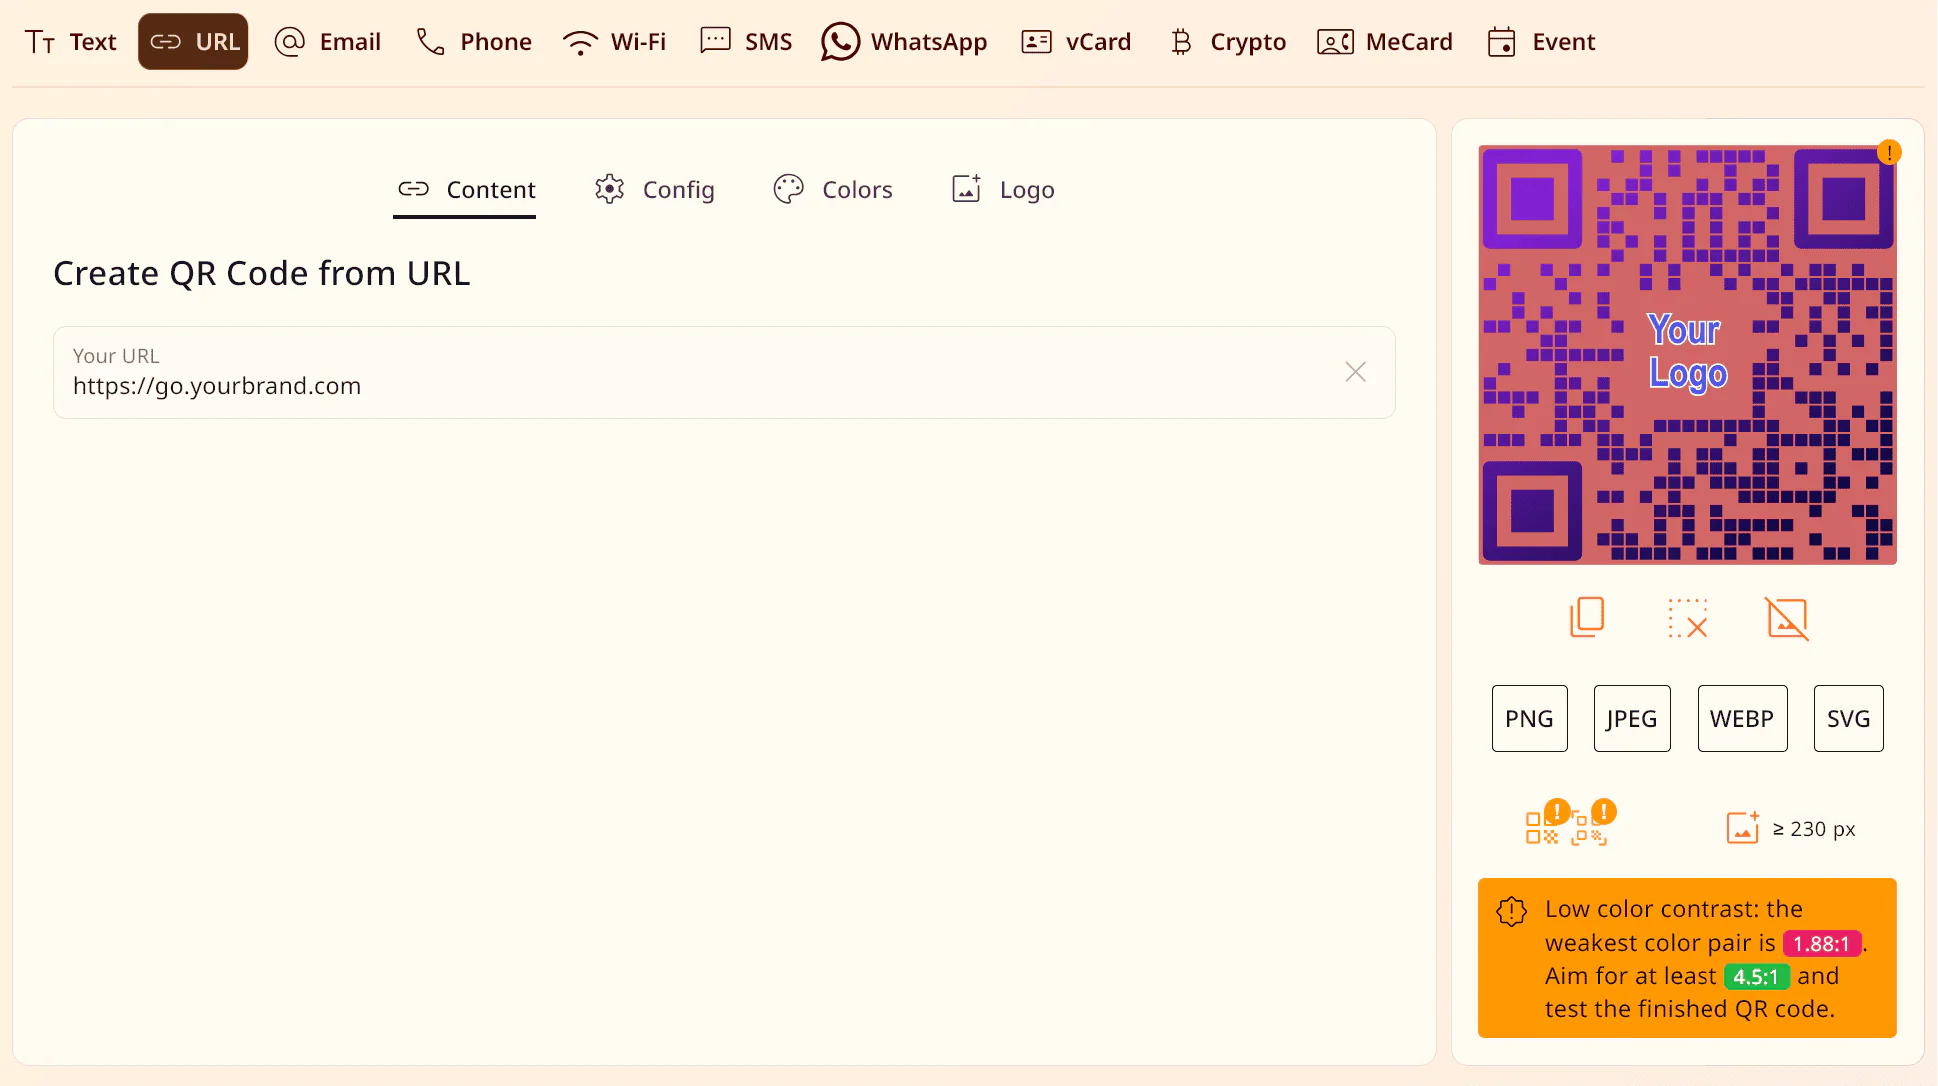
Do not let a border, text, pattern, or the edge of the layout touch the grid. Leave an even, light margin around it and keep decoration away from the corner markers.
QR code size for screens and print
There is no universal size in centimeters. On a screen, the result depends on image resolution, page scale, and distance from the camera. Printing adds printer quality, ink spread, surface texture, and cutting accuracy.
A code on a website is scanned up close; one on a poster is scanned from several steps away. Packaging is usually viewed at short range, but curves and glare get in the way. The same physical size will behave differently in all three cases.
MeoVC calculates a recommended minimum size for both screens and print based on the structure of the individual code. Do not shrink the finished file below that recommendation, and preserve its proportions. A camera may fail to recognize a square that has been stretched into a rectangle.
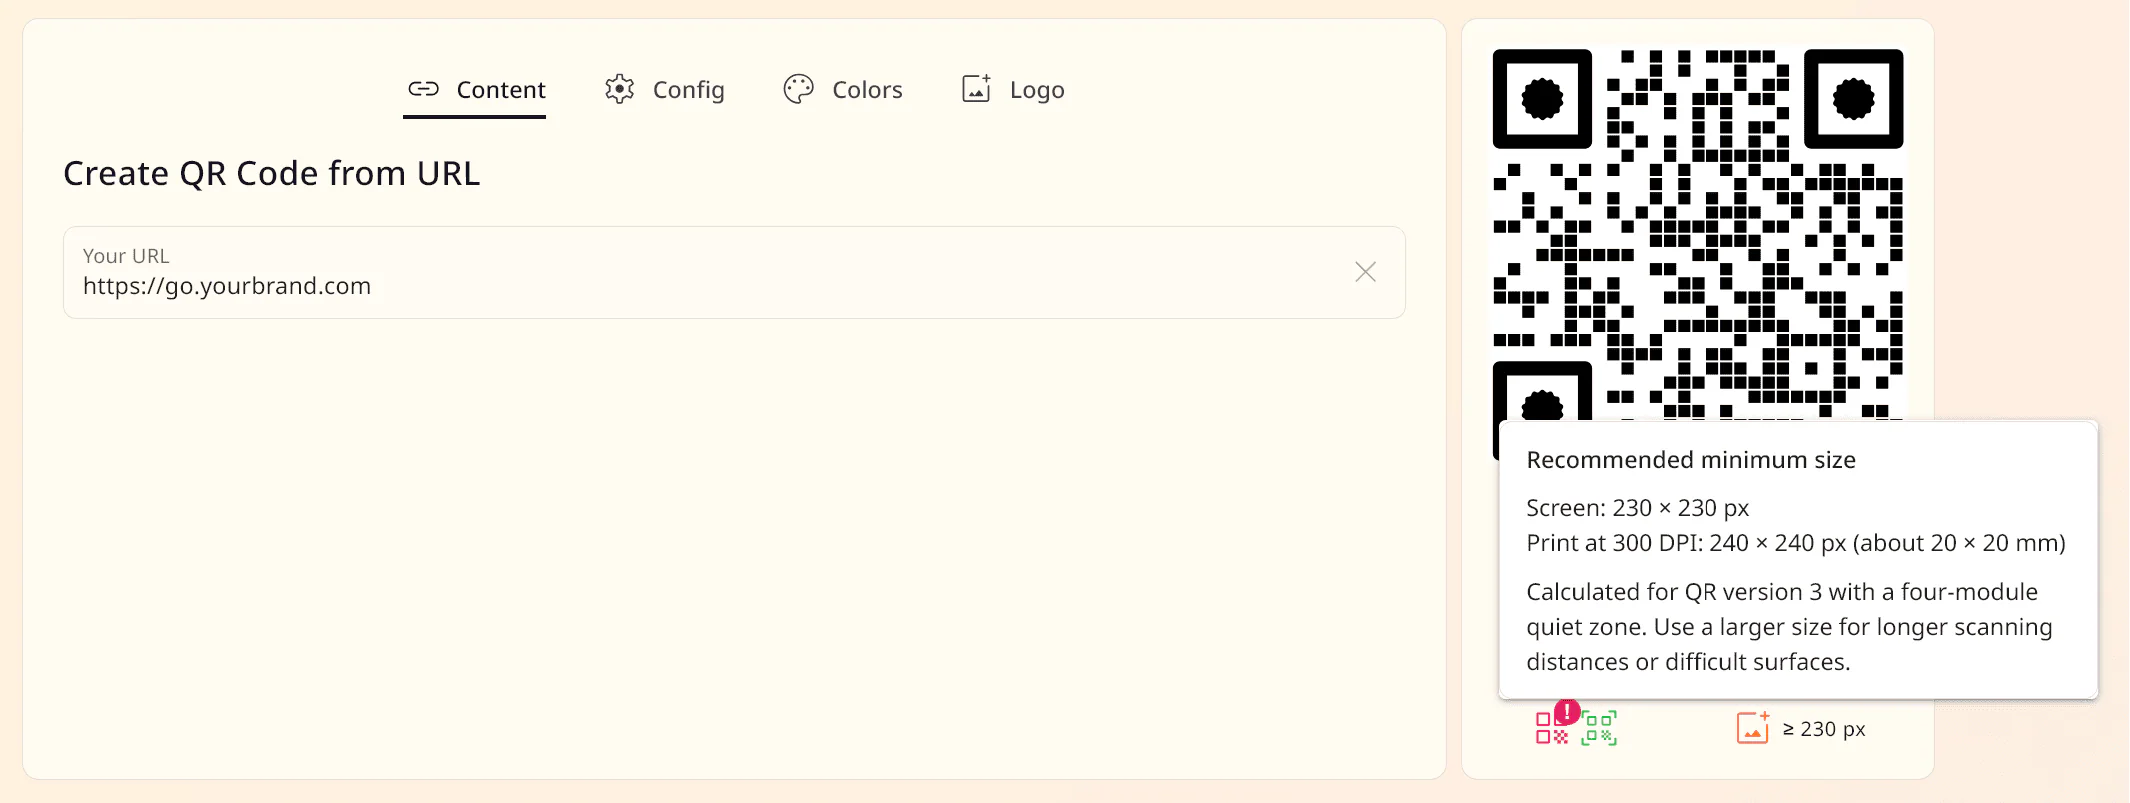
For digital use, choose a sharp image without blur from repeated resizing. A vector format or a raster file with sufficient resolution is better for print. Once the image is in the layout, check its final size rather than the source file alone: an editor may quietly reduce it during export.
Styling a QR code without breaking it
Color, module shapes, and a logo can bring a code into line with a brand. But if the styling hides its structure, some devices will not recognize it. Changing the module shapes, corner markers, background, and colors at the same time is particularly risky: if scanning breaks, you will not know which change caused it.
Change the design one step at a time:
- Keep the three corner markers easy to distinguish.
- Preserve strong contrast and the quiet zone.
- Do not make the modules too thin, disconnected, or similar to the background.
- Add a logo only with a suitable error correction level.
- Test scanning after every change.
A logo usually sits near the center. A backing separates it from the modules, but also covers data, so do not enlarge it without testing again. Error correction can recover the covered section; it does not clear an unlimited space for a logo.
Check the frame separately. If it resembles a fourth corner marker, blends into the modules, or enters the quiet zone, a scanner may misread the code's boundaries.
Why testing on one phone is not enough
A successful scan on a new phone says little about other devices. Cameras, apps, and built-in scanners use different algorithms. Low contrast, inverted colors, complex module shapes, and an inadequate quiet zone expose these differences most clearly.
MeoVC warns about settings that may reduce compatibility across scanner generations. This helps when comparing versions, but it cannot model glare on laminated packaging, a dark venue, or faded print.
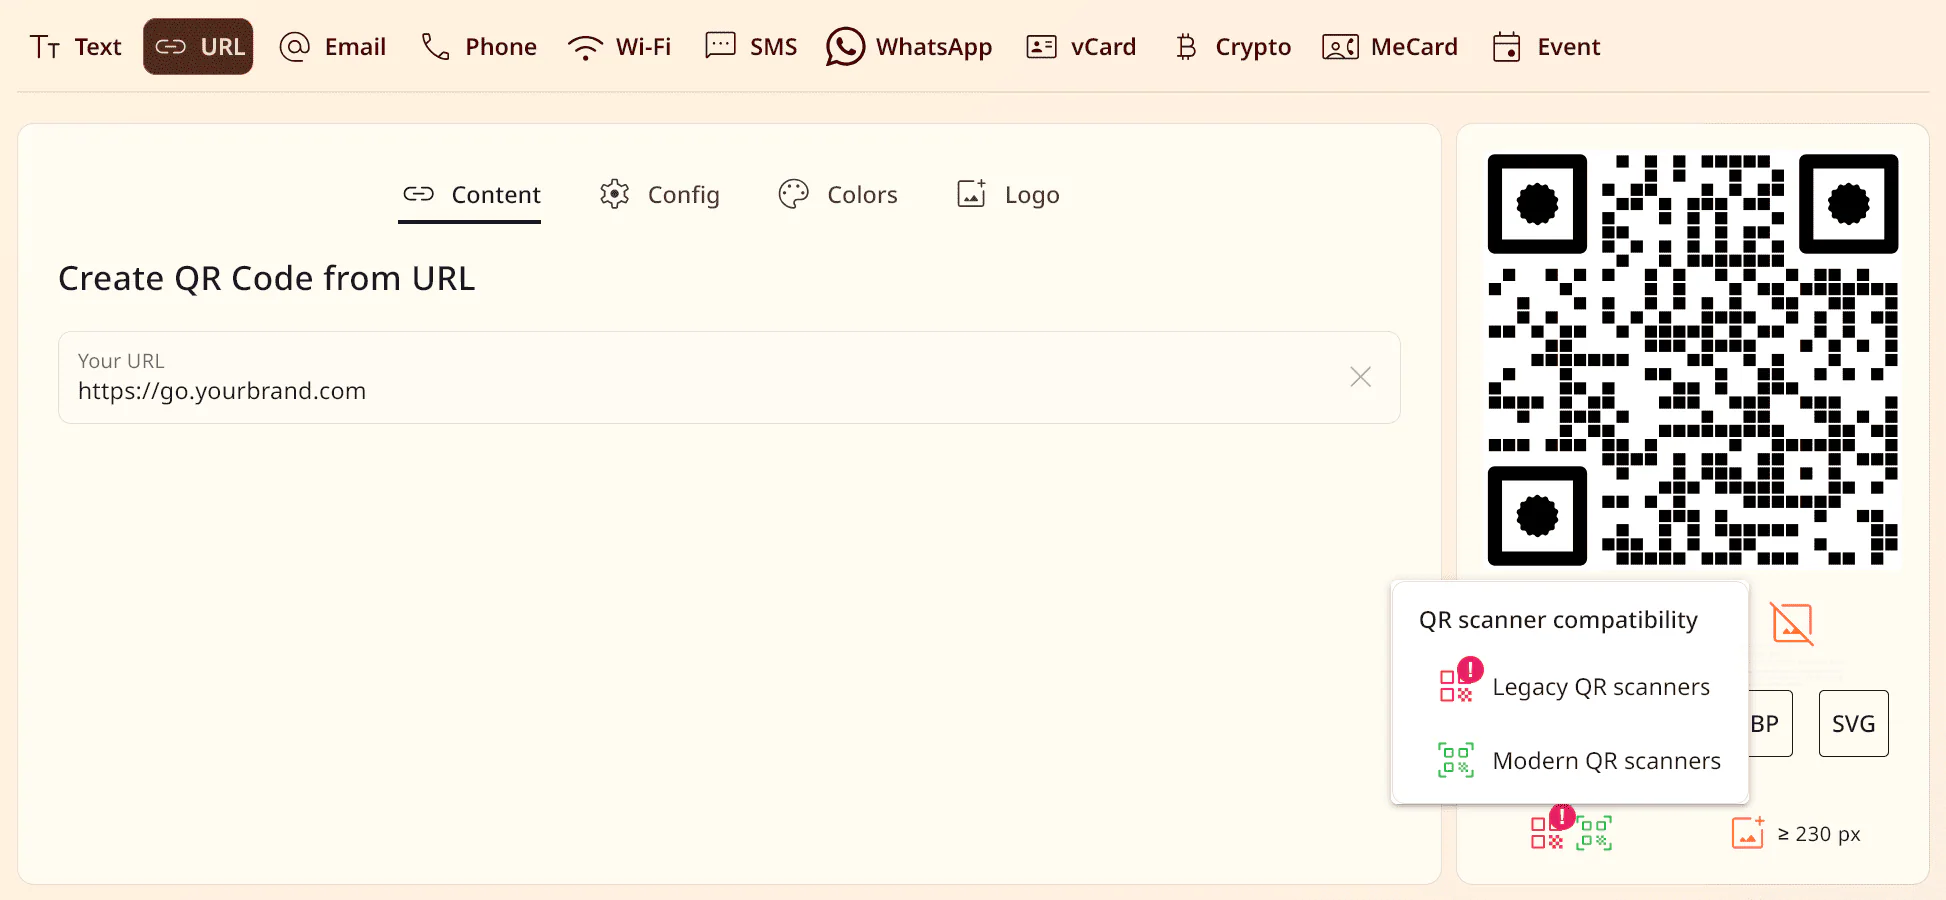
For a digital layout, start with the phone camera and one third-party app. If the code is for a broad audience, add an older device or a separate scanner. Test a printed proof on the same printer and stock, from the expected distance, at an angle, and under the lighting typical of the location. That proof matters more than a perfect result on a monitor.
Creating many QR codes without manual errors
If you need codes for a product catalog, tickets, employees, or individual pages, copying everything by hand soon causes mix-ups. One skipped row or a link pasted twice can leave you with the right image containing the wrong data.
MeoVC bulk QR code creation accepts source data as a list or table and creates a set of files. Before starting, check that every row is unique, addresses use a consistent format, and each record has a clear relationship to its future filename.
After downloading the files, open codes from the beginning, middle, and end of the set. If an error would mean an expensive reprint or the wrong ticket, compare the whole set with the source table, automatically or by hand. A scan test will not catch a swapped link: it can open perfectly and still lead to the wrong place.
What to check in the finished layout
Before publishing, answer five questions:
- does the code lead to the correct page, rather than merely scan successfully?
- have the grid proportions, contrast, and quiet zone survived the layout?
- is the size suitable for the real distance from the camera?
- are the corner markers clear of the logo, frame, and other elements?
- does the final file or printed proof work on the devices your audience uses?
Test the exact layout people will see. The source PNG will not reveal problems introduced by resizing, printing, or placement on a reflective surface.